Tuesday, February 19, 2013

Dandelions - Results

I'll probably continue to work on this (most likely) after this course. But in the scope of this course, this project is done, built, submitted. Done. Finished. A long report has been written and submitted. Its over.

There's a lot of things I'd love to do with it later, but I thought I'd post some images of how it looks these days.

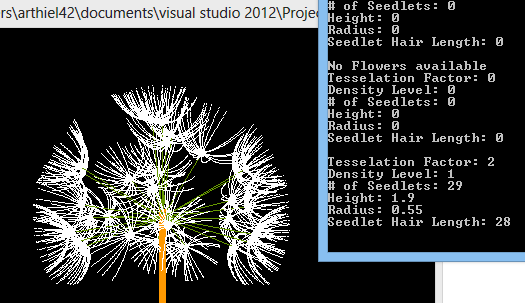
One Dandelion with attributes listed 

A similar dandelion, with different attributes
A lit field. Looks wonky.


Field, with details

Saturday, February 16, 2013

Ray Tracer Part 7 - Tone Reproduction

For the final part of the Ray Tracer, Tone Reproduction, using Reinhard and Ward Compression techniques, were implemented.

Ward Compression

Ward, 1 nit
Ward, 10 nits


Ward, 100 nits
Ward, 1000 nits


Reinhard Compression

This portion I've had a lot of issues with. I realize that in Reinhard, the Max Luminance is supposed to have very little (if any) effect on the luminance of the scene.  Unfortunately, I can't find where in my code this seems to go wrong. The equations seem almost identical to me, and I'm simply at a loss. Instead, I got these interesting images.

My code was as follows (per pixel):
// Part A of Compression            
pixels[y][x].l_red = ( kv * pixels[y][x].l_red ) / log_avg_lum;            
pixels[y][x].l_green = ( kv * pixels[y][x].l_green ) / log_avg_lum;            
pixels[y][x].l_blue = ( kv * pixels[y][x].l_blue ) / log_avg_lum;    
       
// Part B of Compression            
pixels[y][x].l_red = ((pixels[y][x].l_red)/ (1 + pixels[y][x].l_red)) *ld_max; pixels[y][x].l_green = ((pixels[y][x].l_green)/ (1 + pixels[y][x].l_green)) * ld_max;            
pixels[y][x].l_blue = ((pixels[y][x].l_blue)/ (1 + pixels[y][x].l_blue))*ld_max;

// Apply Device Model            
pixels[y][x].l_red = pixels[y][x].l_red / ld_max;            
pixels[y][x].l_green = pixels[y][x].l_green / ld_max;            
pixels[y][x].l_blue = pixels[y][x].l_blue / ld_max;            

// Print Point to Screen            
glColor3f( pixels[y][x].l_red, pixels[y][x].l_green, pixels[y][x].l_blue ); glVertex2d( x, y );

Reinhard, 1 nit
Reinhard, 10 nits


Reinhard 100 nits
Reinhard 1000 nits

Reinhard, with different Key-Value pixel selection

I was still able to use a key-value pixel selection for this, which showed a little better effect. All pictures were taken with a Lmax of 1, to simulate if my Reinhard above was working properly.


Reinhard, Key Value at x=400 y=400
Reinhard, Key Value at x=100 y=100


Reinhard, Key Value at x=250 y=250

Friday, February 8, 2013

Ray Tracer Part 6: Transmission

This part of the ray tracer is adding a transmission ray to the front sphere.


Wednesday, February 6, 2013

Renderman Images

For this assignment, we were asked to play around with Renderman and make some changes to a given image. One image was to display changes of the different attributes of the initial image, and the other image was to change the shaders (downloaded & modified, or a shader of your own).

On the attribute-change image, I changed the color of the plastic ball, spread out the wooden pattern with less roughness and more ring-scale, and increased the brick-width and mortar thickness of the brick floor.

For the image with new shaders, the wall is a stucco shader from the shader repository, in which I inverted the displacement of the stucco giving it a more cement-like feel. The ball is shaded with "funkyglass", which I changed to have a more transparent feel, darker edges, and more colors; resulting in a oil-bubble like image. The shader on the bottom was one I wrote myself, using the noise function to mix between an opacity value and a given color. 

Attribute Changes on original image
Shader changes on original image


For the extra assignment, we were to make a separate image and different shaders. The below is my submission of the Towers of Hanoi. For this submission, I used the provided "plastic" and "wood2" surface shaders, and modified some of their attributes. I also retrieved a "superplank" surface shader for the floor and "KMPuffyclouds" for the sky. I then also created my own "grass" displacement shader, and added my "coals" shader from the above shader image in a green color to make a better grass effect.

Towers of Hanoi